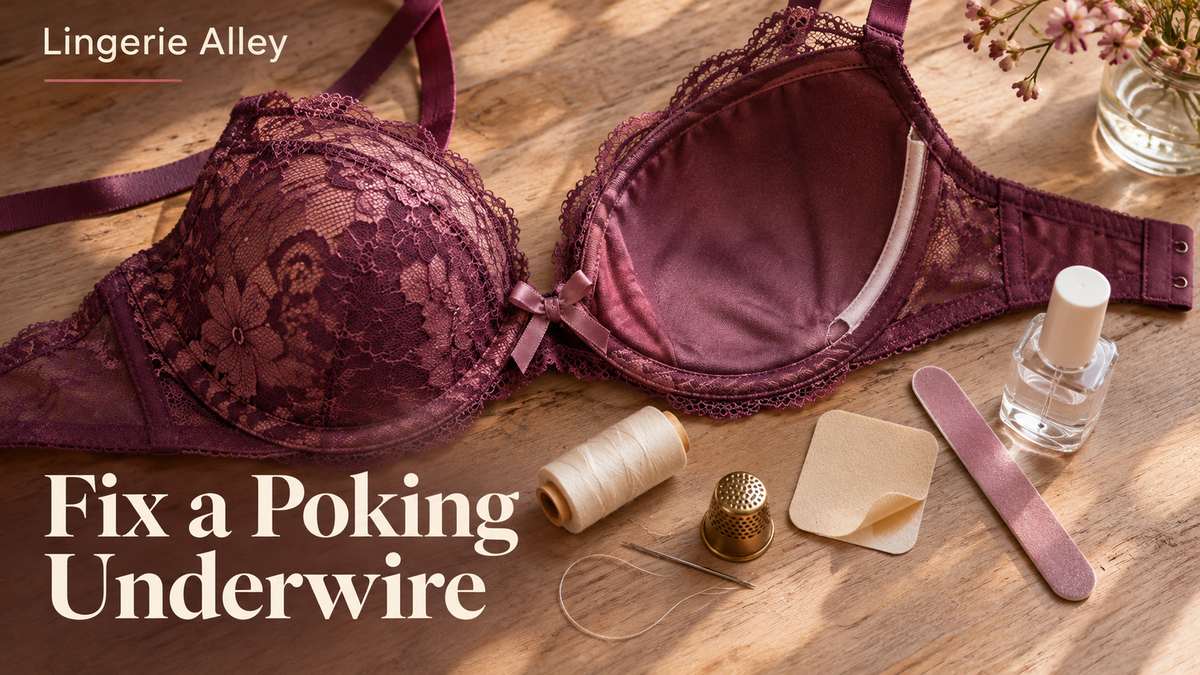
It usually starts as a scratch you notice at lunch. By evening there is a silver tip, about the size of a grain of rice, sticking out of the fabric at the center of your bra or right under your arm. The wire is fine. What failed is the thin tube of fabric holding it, and that tube is easy to repair at home with things you probably already own.
Why Underwires Escape in the First Place
Every underwire sits inside a channel called the casing or channeling, a narrow tube of tightly woven or brushed fabric sewn along the base of each cup. At each end of the wire, the channel is closed by a bar tack, a short block of dense zigzag stitches that acts as a stopper. The wire tips themselves are usually dipped in a plastic or nylon coating so they are blunt.
A wire gets out when one of those three things wears down:
- The bar tack pops. The stitches at the end of the channel loosen, and the wire slides through the open end. This is the cleanest failure and the easiest fix.
- The tip coating wears off. A bare metal tip rubs on the inside of the channel every time the wire flexes, and eventually saws a small hole through it.
- The channel fabric thins. Years of bending in a washing machine drum wear the casing down until a tip pushes straight through the side.
Most escapes happen at the center gore end or the underarm end, where the wire tips sit and the most flexing happens.
Before You Start: Check the Wire and the Channel
Spend thirty seconds on diagnosis, because it decides whether the repair is worth doing.
Is the wire whole?
Push the escaped tip back into the channel and run your fingers along the full curve from the outside. You should feel one smooth, continuous arc. If you feel a sharp break, a kink or two separate ends, the wire has snapped. A patched channel will not help a broken wire, since the broken ends will keep working outward and the cup will lose its shape.
Where is the hole?
Look at the inside of the bra, where the channel is visible. Note whether the wire came out through the open end of the channel (the bar tack failed) or through the side of the casing (the fabric wore through). Also check the other cup. If one wire has escaped, the matching end on the other side is often close behind, and it takes two extra minutes to reinforce it now.
Is the rest of the bra still worth saving?
Stretch the band gently. If the elastic feels crunchy, stays stretched, or has lost its grip, the bra is near the end of its life anyway, and the signs it's time to replace a bra are worth a read before you spend time on it. A repair makes sense on a bra that still fits and still holds you up.
The 10-Minute Fix, Step by Step
You need:
- A sewing needle with an eye big enough for thick thread
- Heavy-duty polyester or upholstery thread in a color close to the channel
- A thimble (the channeling is thick and hard to push through)
- Clear nail polish, or fabric glue that dries flexible
- A patch: moleskin from the foot care aisle, an iron-on mending patch, or a ready-made underwire repair patch
- A nail file, only if the wire tip is rough
Step 1: Blunt the tip while it is still out
Do this first, while the tip is exposed. If you can feel or see bare metal, that tip is the reason the wire got out, and it will saw through again unless you cover it. File off any burr with a nail file, then dab clear nail polish or flexible fabric glue on the end. Let it dry for a few minutes and add a second coat. You want a small rounded bead, not a long drip.
Step 2: Ease the wire back in
Once the cap is dry, push the tip back into the channel, wiggling gently so it does not catch and tear the hole wider. If it sticks, draw it out a little and try again rather than forcing it.
Step 3: Patch the hole from the inside
Cut your patch into a rounded rectangle a bit larger than the hole, roughly 1 inch by half an inch for a typical tip escape. Rounded corners matter: square corners lift and peel within a few wears.
- Moleskin is the fastest option. Peel the backing, press it over the hole on the inside of the channel, and hold it firmly for thirty seconds. It is soft against skin, though the adhesive gives up after a number of washes, so treat it as a patch you will renew.
- Iron-on patches last longer but need heat. Many bra fabrics are nylon blends that can scorch or melt, so use the lowest setting that activates the adhesive, put a pressing cloth between the iron and the bra, and test on a hidden part of the channel first. Keep the iron well away from lace and any molded foam cup.
- Underwire repair patches are sold specifically for this and usually combine an adhesive backing with a thicker fabric face. They work like moleskin.
Step 4: Stitch a new stop
The patch covers the hole. The stitching keeps the wire from reaching it again. Thread your needle with a double strand of heavy-duty thread, about 18 inches long once doubled, and knot the end.
- If the wire came out the side of the channel, close the hole first with a few small whipstitches through the channeling only, not through the cup fabric above it.
- Then make your stopper. Just past the wire tip, sew straight across the channel, from one edge to the other, eight to ten times in the same spot. This recreates the bar tack. Keep the stitches tight against the end of the wire so it has no room to travel.
- Knot on the inside, then run the needle back through the channel for half an inch before clipping the thread, so the tail cannot work loose.
Put the bra on and move your arms around before trusting it for a full day. If the tip presses on the new stitches, add a few more passes.
Matching the Fix to the Hole
Not every escape needs all four steps.
Wire out the end of the channel, tip still coated
The bar tack failed, nothing more. Push the wire back (step 2) and stitch a new stop (step 4). No patch needed.
Wire through the side, near the end
The classic case. Do all four steps, with extra attention to blunting the tip, because a bare tip caused it.
Wire through the middle of the curve
The casing has worn thin along its length. A patch will hold for a while, but other spots along the same channel are probably thin too. Patch it, and plan on replacing the bra sooner rather than later.
Holes at the same spot on several bras
If your wires keep escaping in the same place, look at fit and at how you wash. A wire that sits on breast tissue rather than behind it gets bent every time you move, and that flexing wears the channel much faster. The quiz includes a breast shape step that can point you toward wire widths that suit your shape.
Washing Habits That Keep Wires Where They Belong
A wire escapes because it flexes. Each bend drags the tip a fraction of an inch along the casing, and a machine drum can bend a loose bra over and over in a single cycle. So the habits that matter are the ones that stop the wire bending:
- Fasten the hooks and bag each bra on its own. A bra twisting free in the drum gets folded across the wire; a closed band in its own mesh bag mostly tumbles flat.
- Do not fold one cup into the other. It bends both wires at the gore, right where the tips sit.
- Keep a repaired bra out of the dryer. Heat softens patch adhesive and nail polish caps, and tumbling bends the wire you just secured.
For detergent, water temperature, drying and rotation, our guide to washing bras without destroying them has the full routine.
Frequently Asked Questions
Can I just pull the wire out and wear the bra without it?
You can. Some bras become a comfortable soft-cup bra this way, especially in smaller cup sizes. You will lose some lift and separation, and the empty channel can twist, so tack the channel ends closed to keep the band neat.
Does superglue work instead of nail polish?
It can cap the tip, but it dries hard and brittle and can crack when the wire flexes. It can also stiffen fabric it touches. Clear nail polish or a flexible fabric glue is a gentler choice.
Will a tailor or alterations shop fix this?
Many will, and it is usually a quick job for them. It is worth asking if the bra is expensive, if the channel is badly worn, or if you would rather not sew through thick channeling yourself.
Will the patch show through clothes?
A patch on the inside of the channel sits under the cup, so it does not usually show through tops. If the patch is thick or has square corners it can feel noticeable, which is another reason to round the corners and keep it small.
One Last Tip
Keep a small repair kit in your lingerie drawer: a needle already threaded with doubled heavy-duty thread, a few precut moleskin rectangles and a bottle of clear nail polish. When you feel the first scratch of a wire, fixing it that evening takes ten minutes. Waiting until the tip is fully out usually means a bigger hole and a bigger patch. And next time you shop, look at the channel ends before you buy. Dense, wide bar tacks and soft, thick channeling are among the quality markers worth checking before buying a bra.
Find Your Perfect Fit
Take our 60-second quiz and get personalized lingerie recommendations matched to your body, style, and budget.
Take the Quiz